How to Automate TradingView to Rithmic Video Explanation

Rithmic Connection Steps
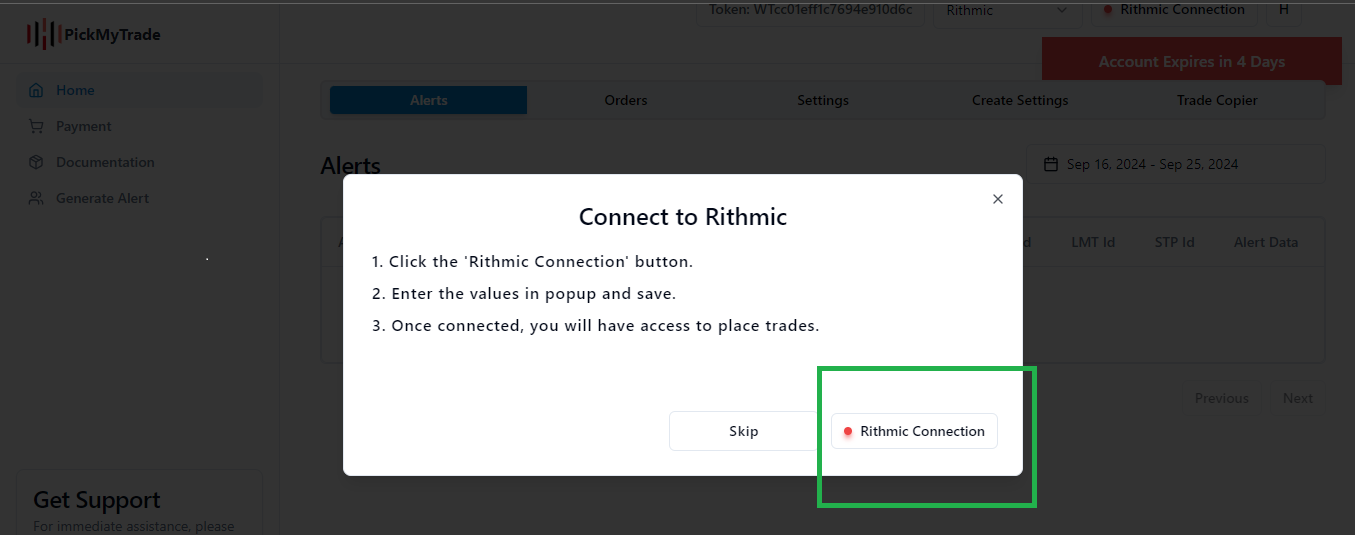
Step 1:
A. When the popup appears, simply click the Rithmic Connection button. This will establish the Rithmic Connection
B. If the popup doesn’t show, just click the Rithmic Connection button to connect

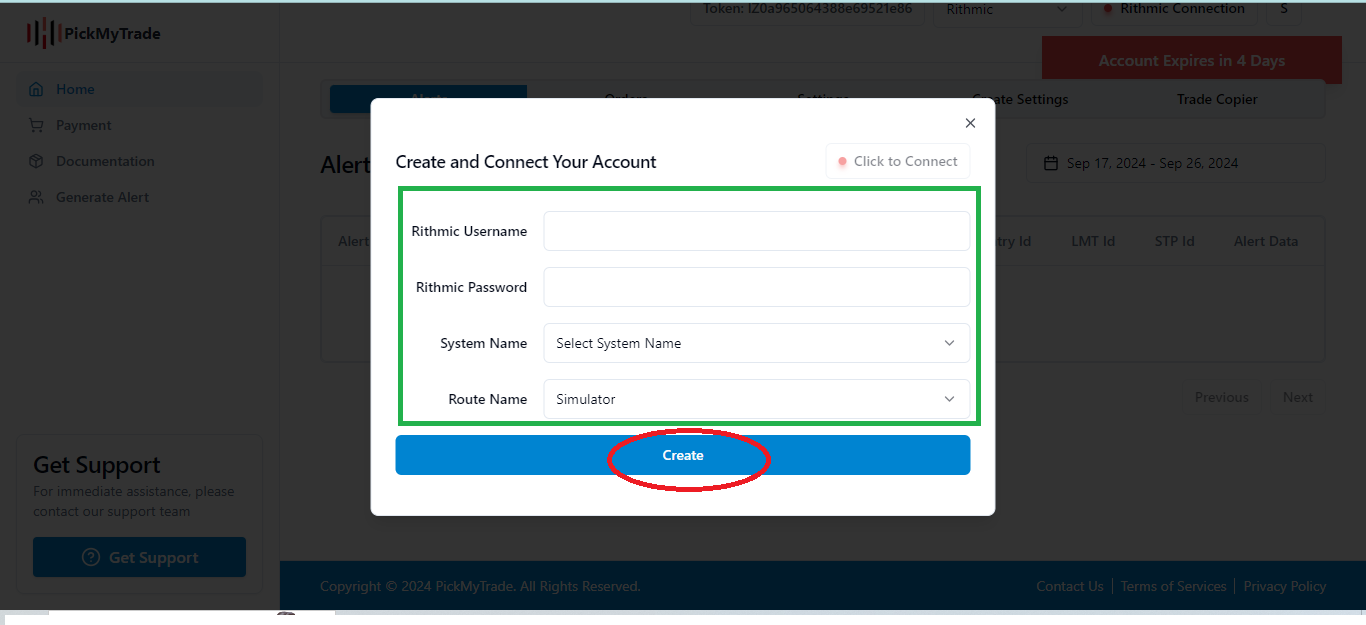
Step 2:
Input Credentials.
- Rithmic Username: Enter your Rithmic User ID in the designated input field.
- Password: Enter your Rithmic Password in the password input box.
- System Name: Select the system name from the dropdown menu as Rithmic.
- Route Name:If the system name is "Rithmic_01" or "Rithmic_Test," then the default Route Name is "GLOBEX." For any other system names, the Route Name will be "Simulator."
- Create: Click on Create.
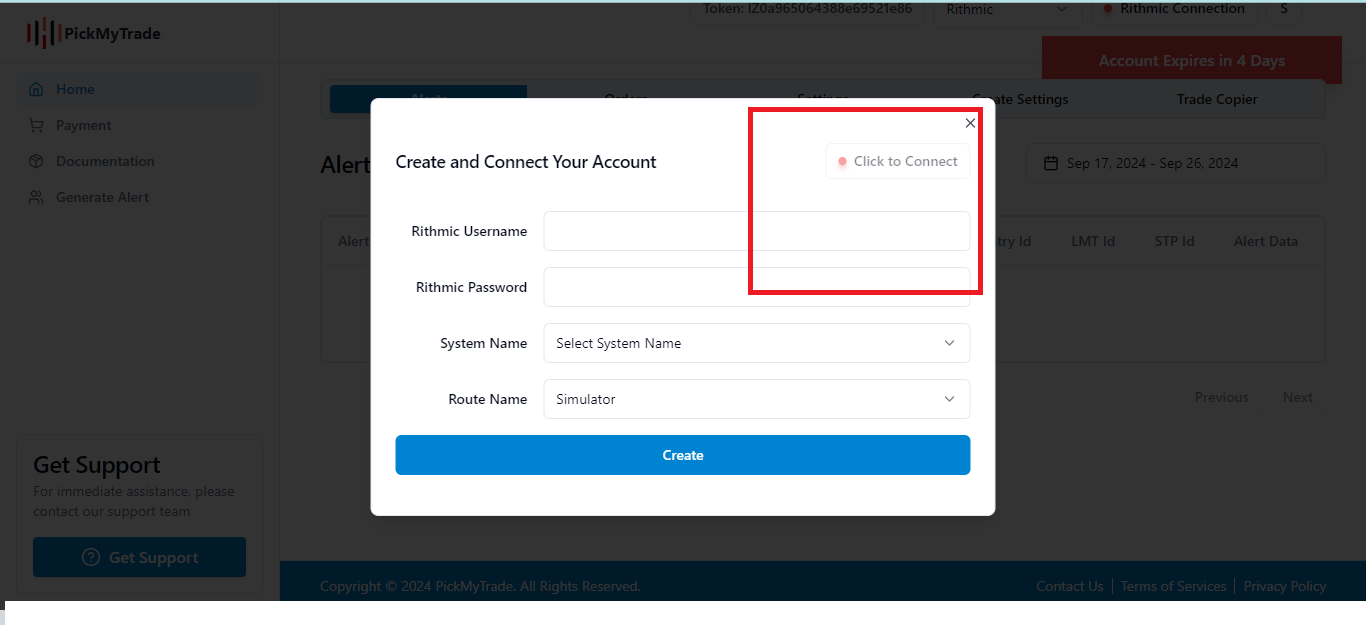
Step 3:
After clicking Create, Now simply press Click to Connect to complete the connection.
Step 4: Successfully Connected
Now a pop-up will appear. Please generate the alert.
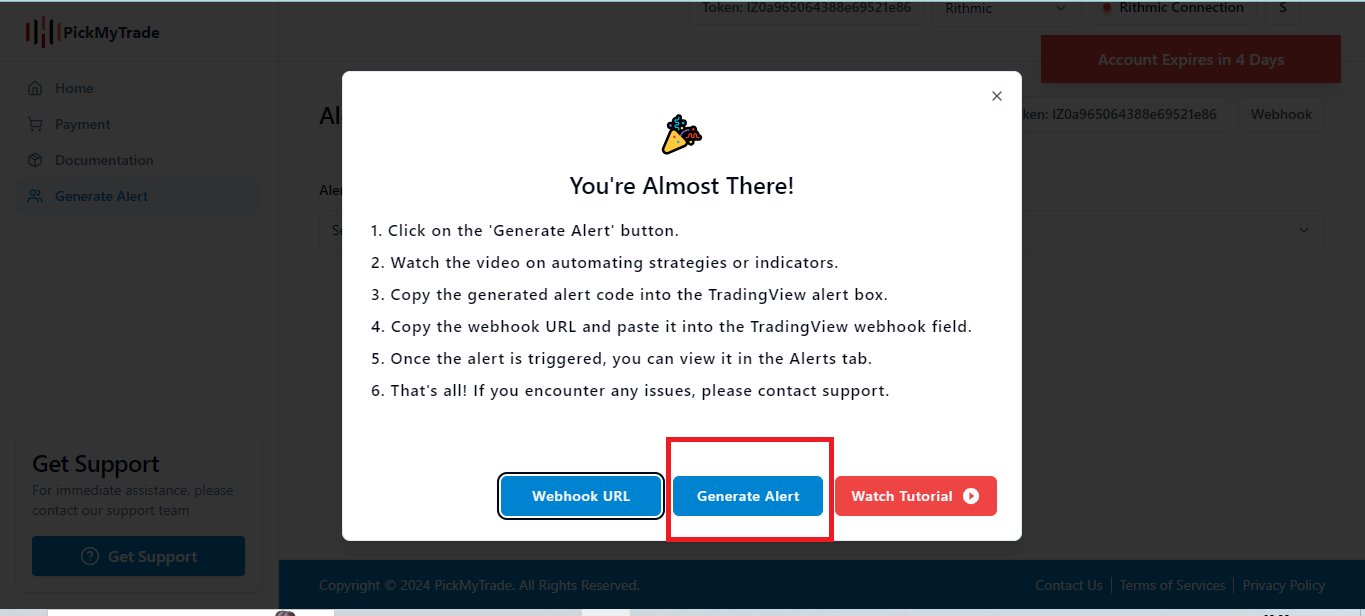
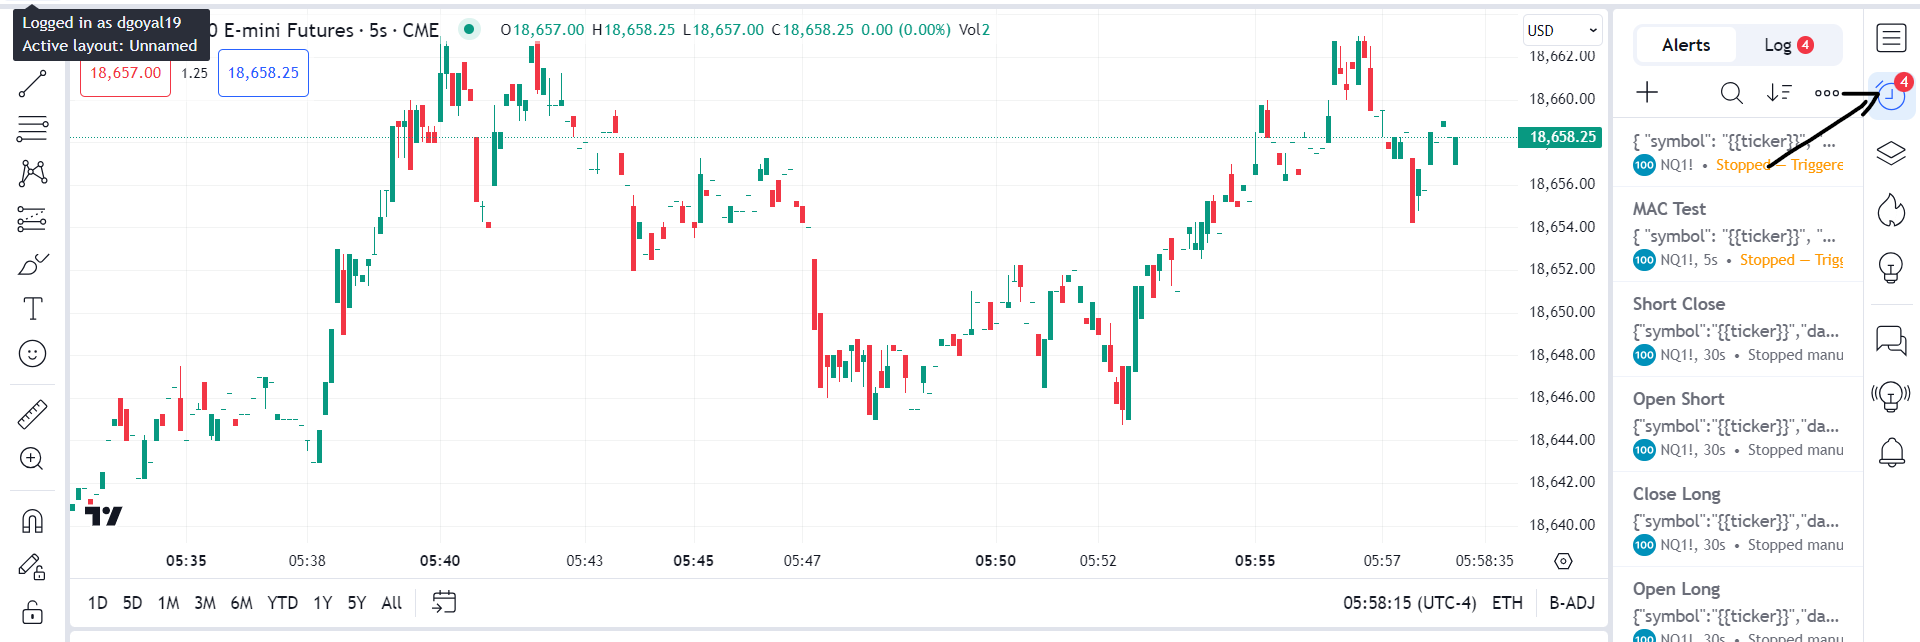
Step 5:
Open alert window in Trading View as shown in below image.
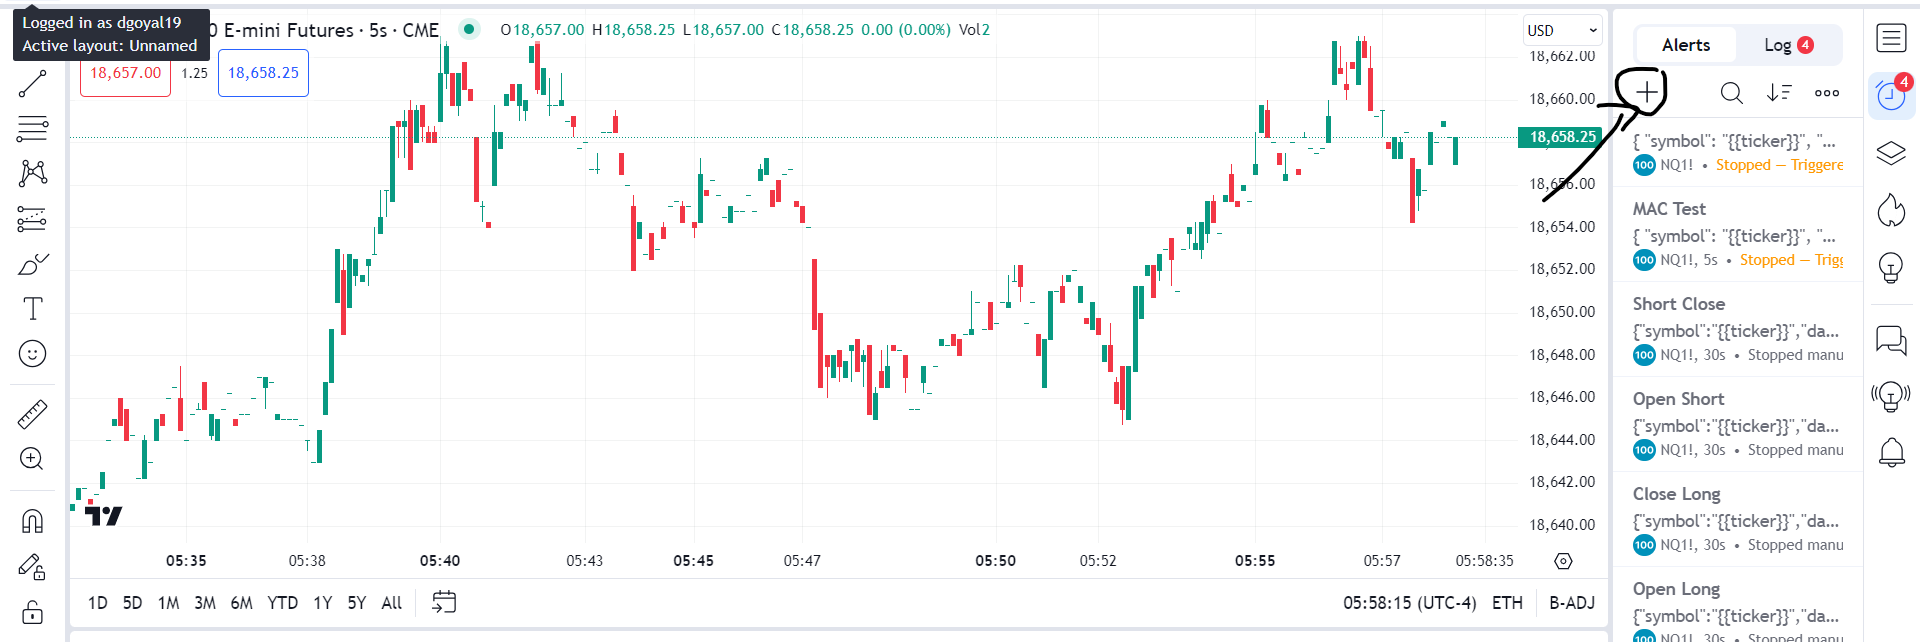
Step 6:
Click on Plus Icon in TradingView to create an alert for placing a trade in Rithmic.
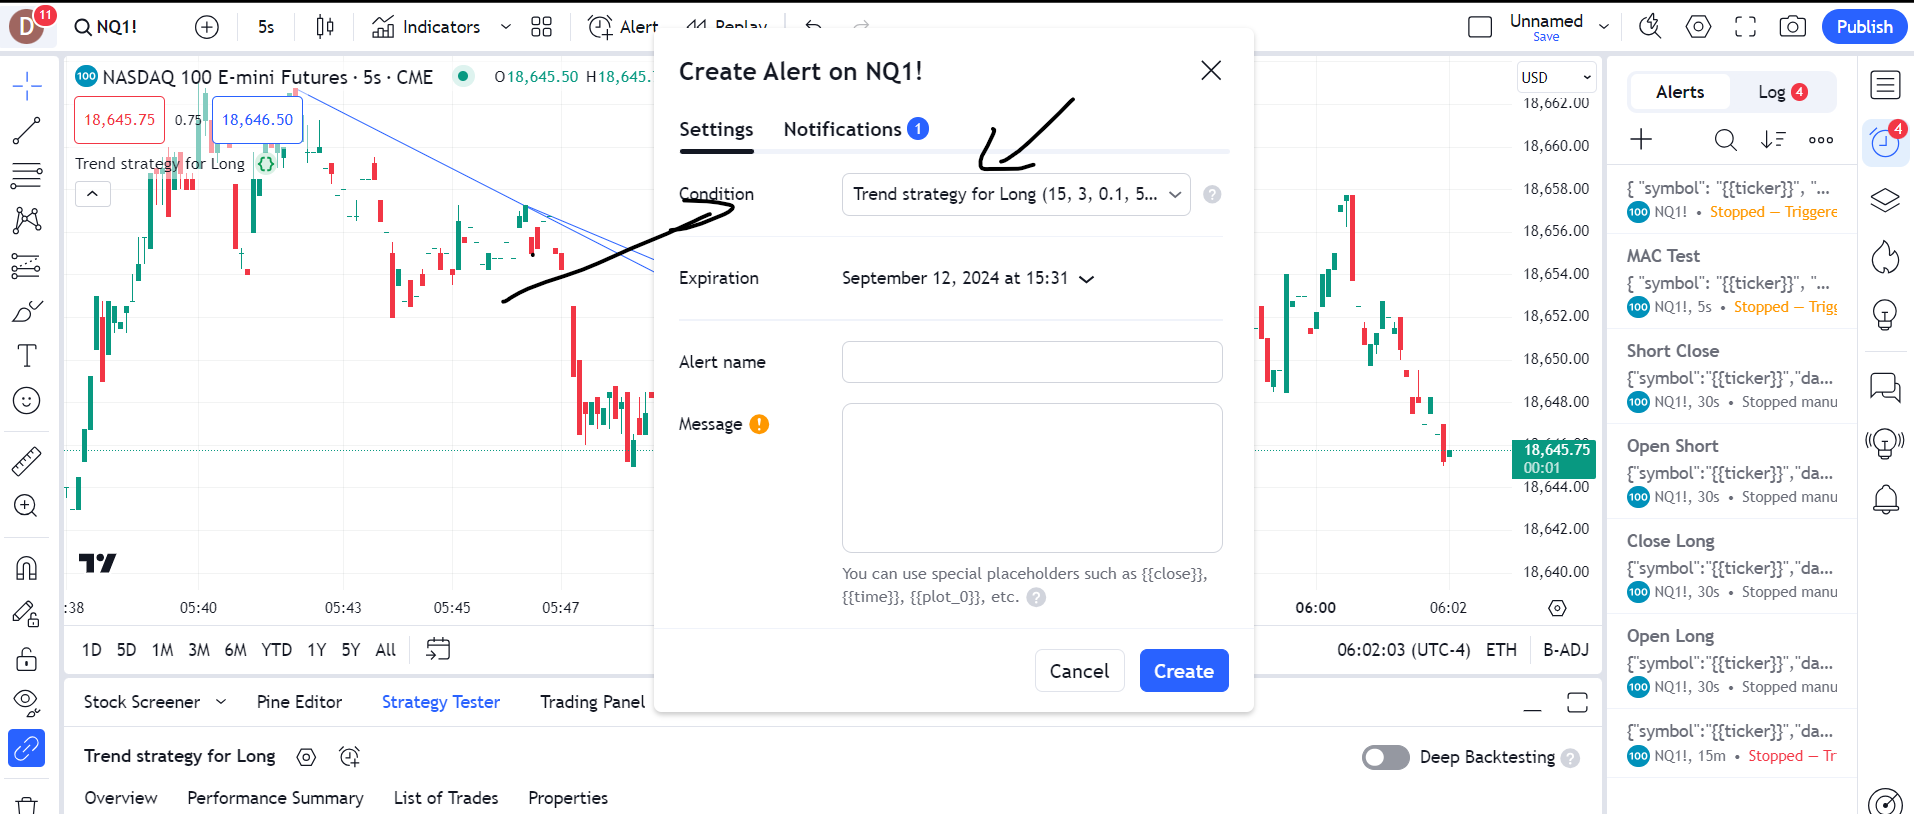
Step 7:
In the Condition box on TradingView, select your indicator or strategy that you want to automate with Rithmic
-
Step 8:
Go to PickMyTrade and click on Generate Alert or use the URL below after logging in: PickMyTrade Alerts. You can select strategies or indicators, set parameters, and generate an alert for TradingView. Watch the tutorial here.
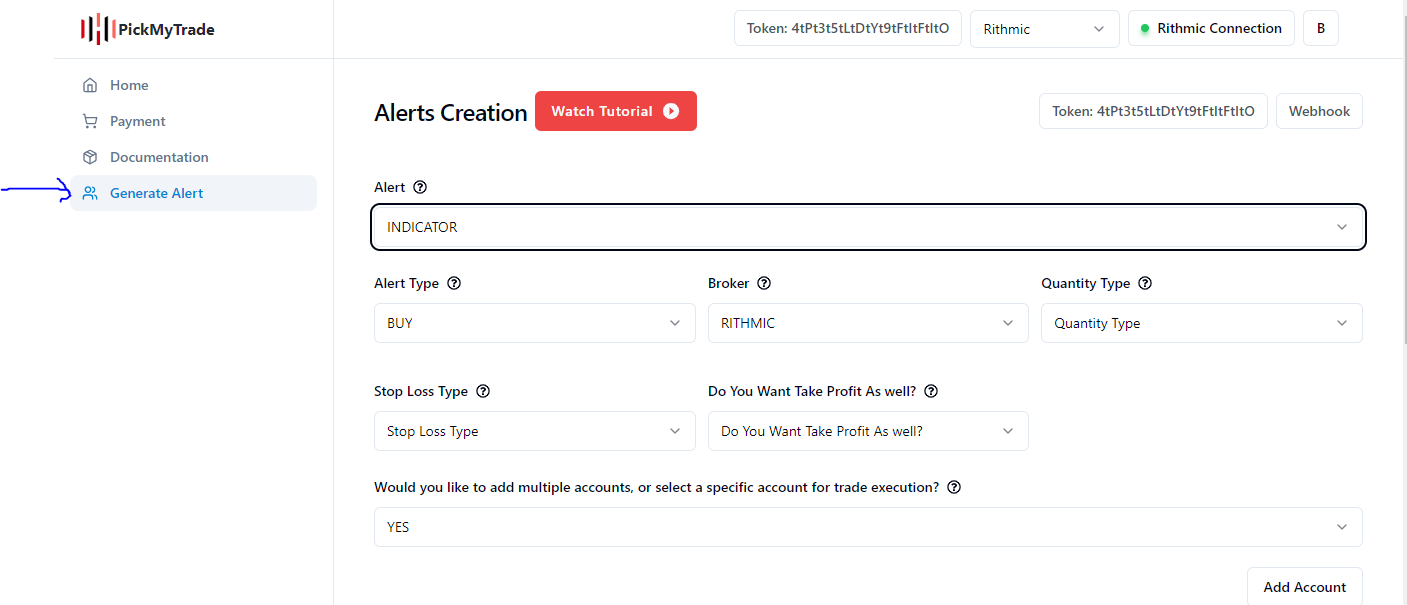
-
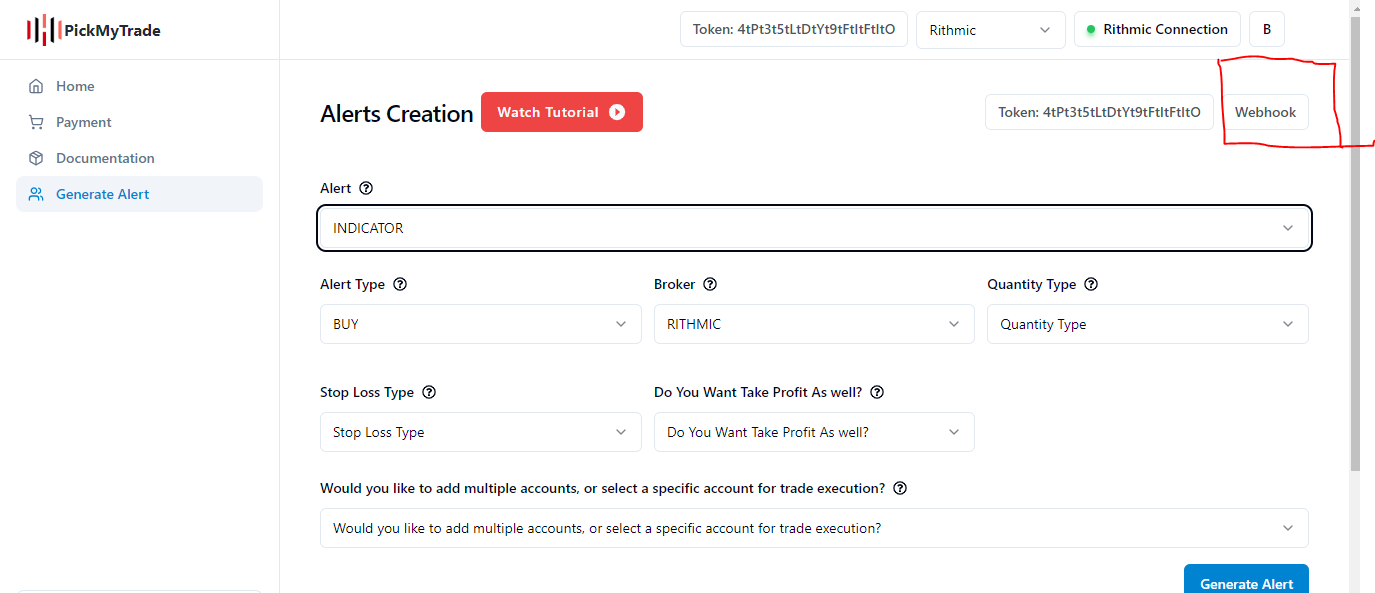
Step 9:
Click on Generate Alert, copy the code, and paste it into the TradingView alert message box.
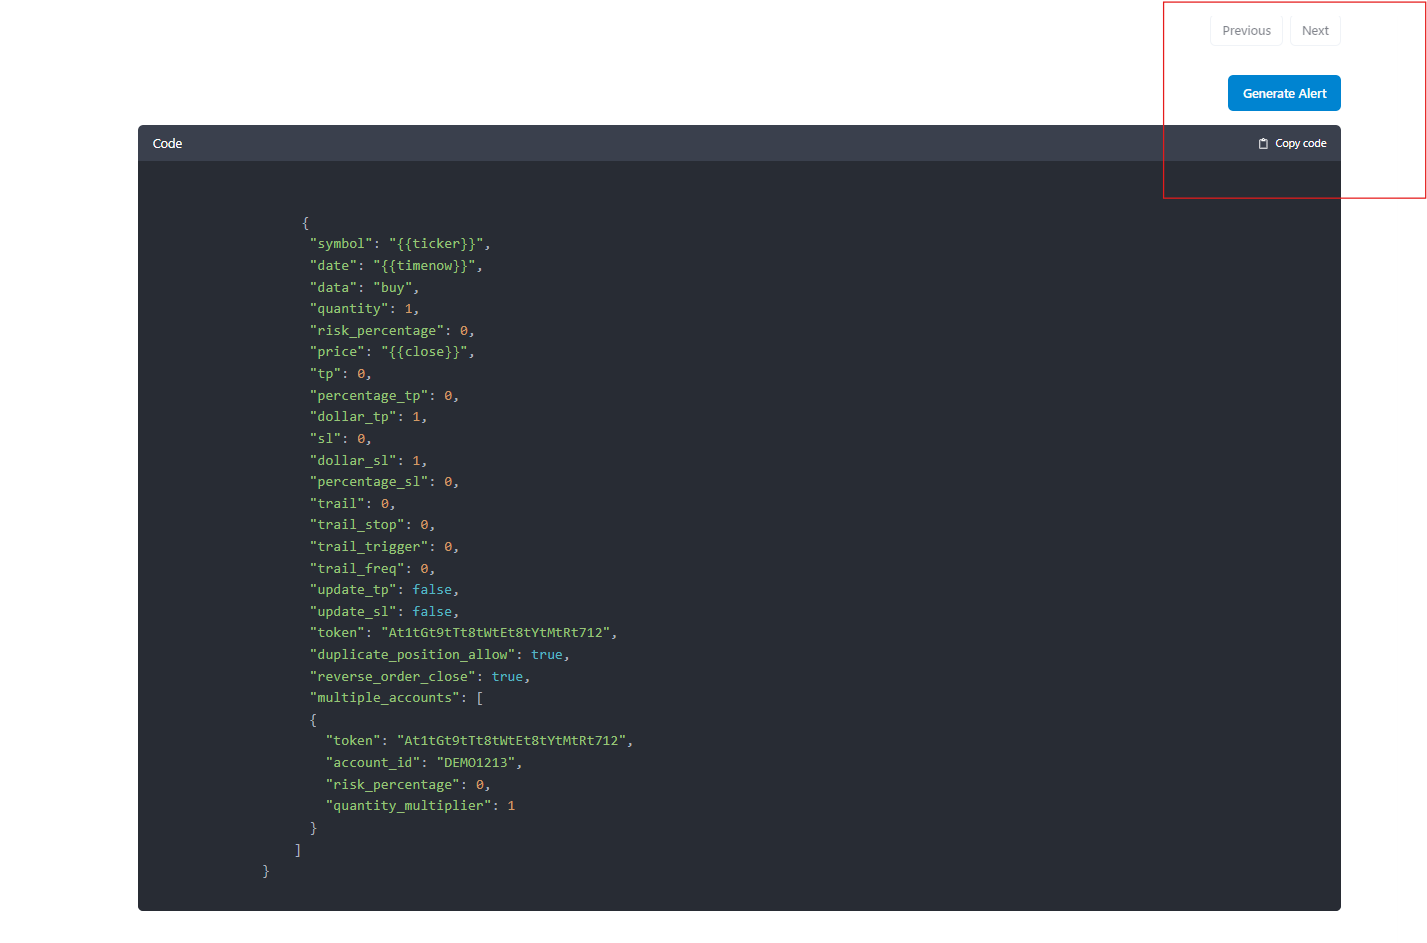
-
Step 10:
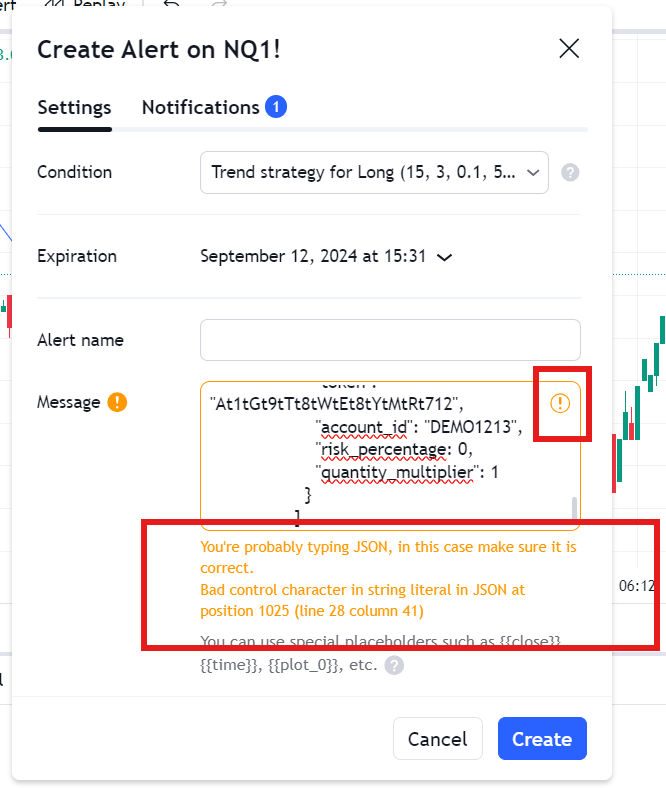
Paste the alert in the Message Box in TradingView Alert.
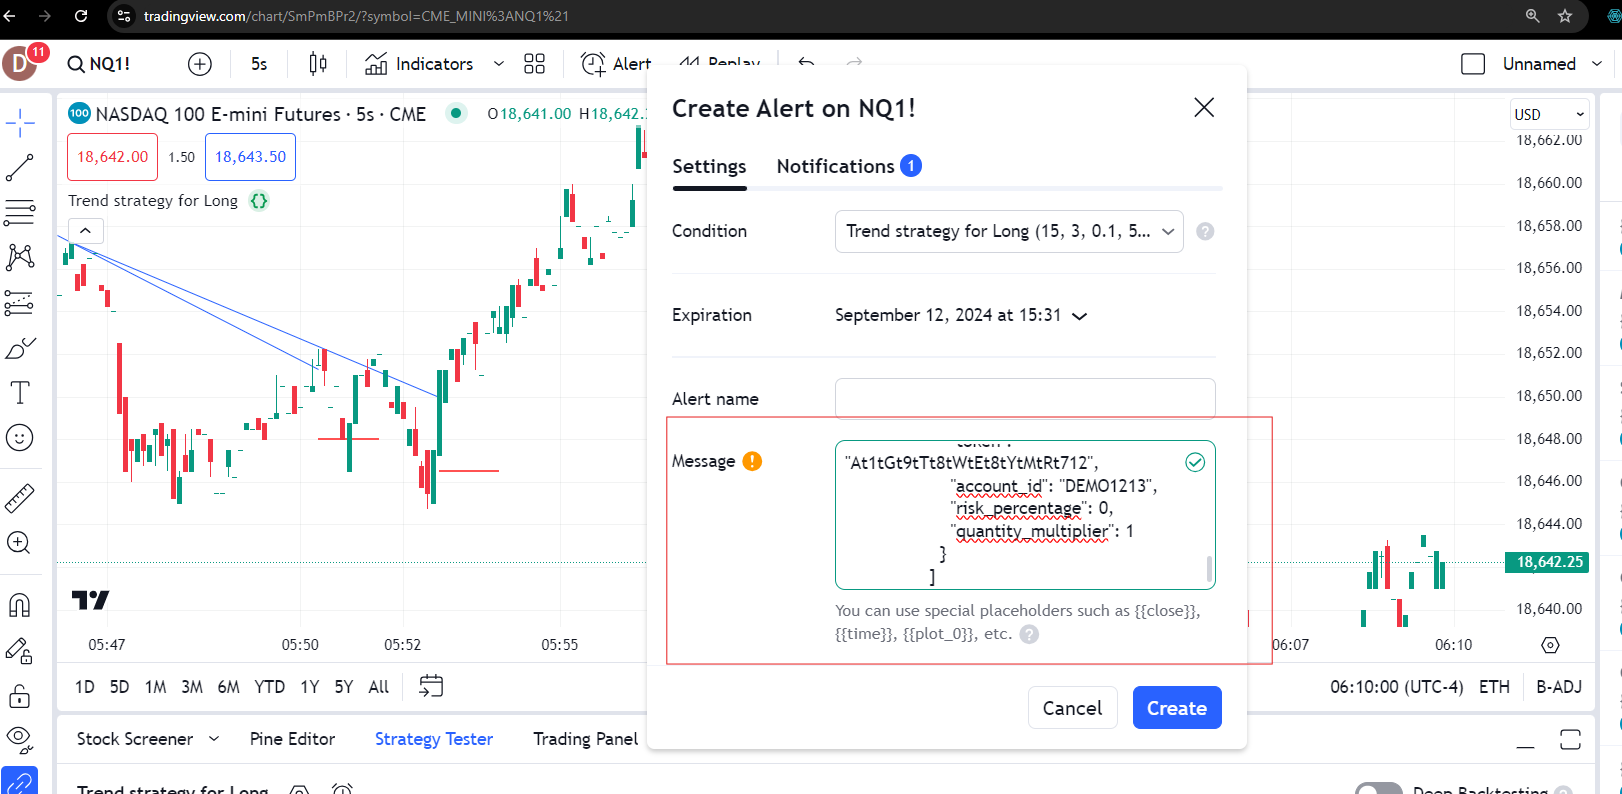
-
Step 11:
Ensure the correct icon appears, showing that everything copied into TradingView is correct. Your TradingView webhook is now configured.
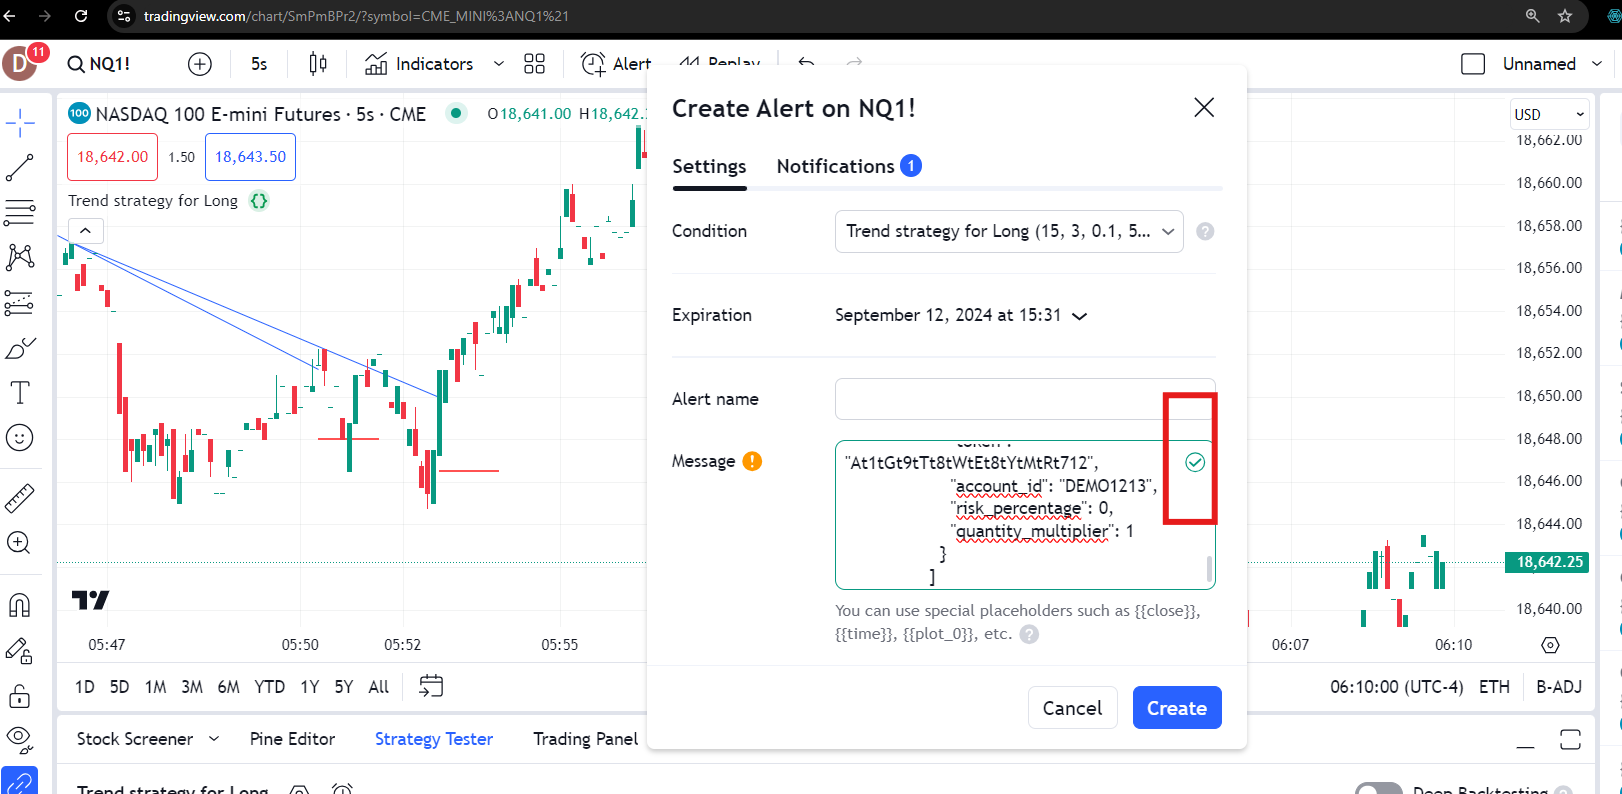
-
Step 12:
If an error occurs, re-copy the code from PickMyTrade. Manual edits may cause errors.
-
Step 13:
Copy the webhook URL from PickMyTrade by clicking the webhook button in the Generate Alert section.
-
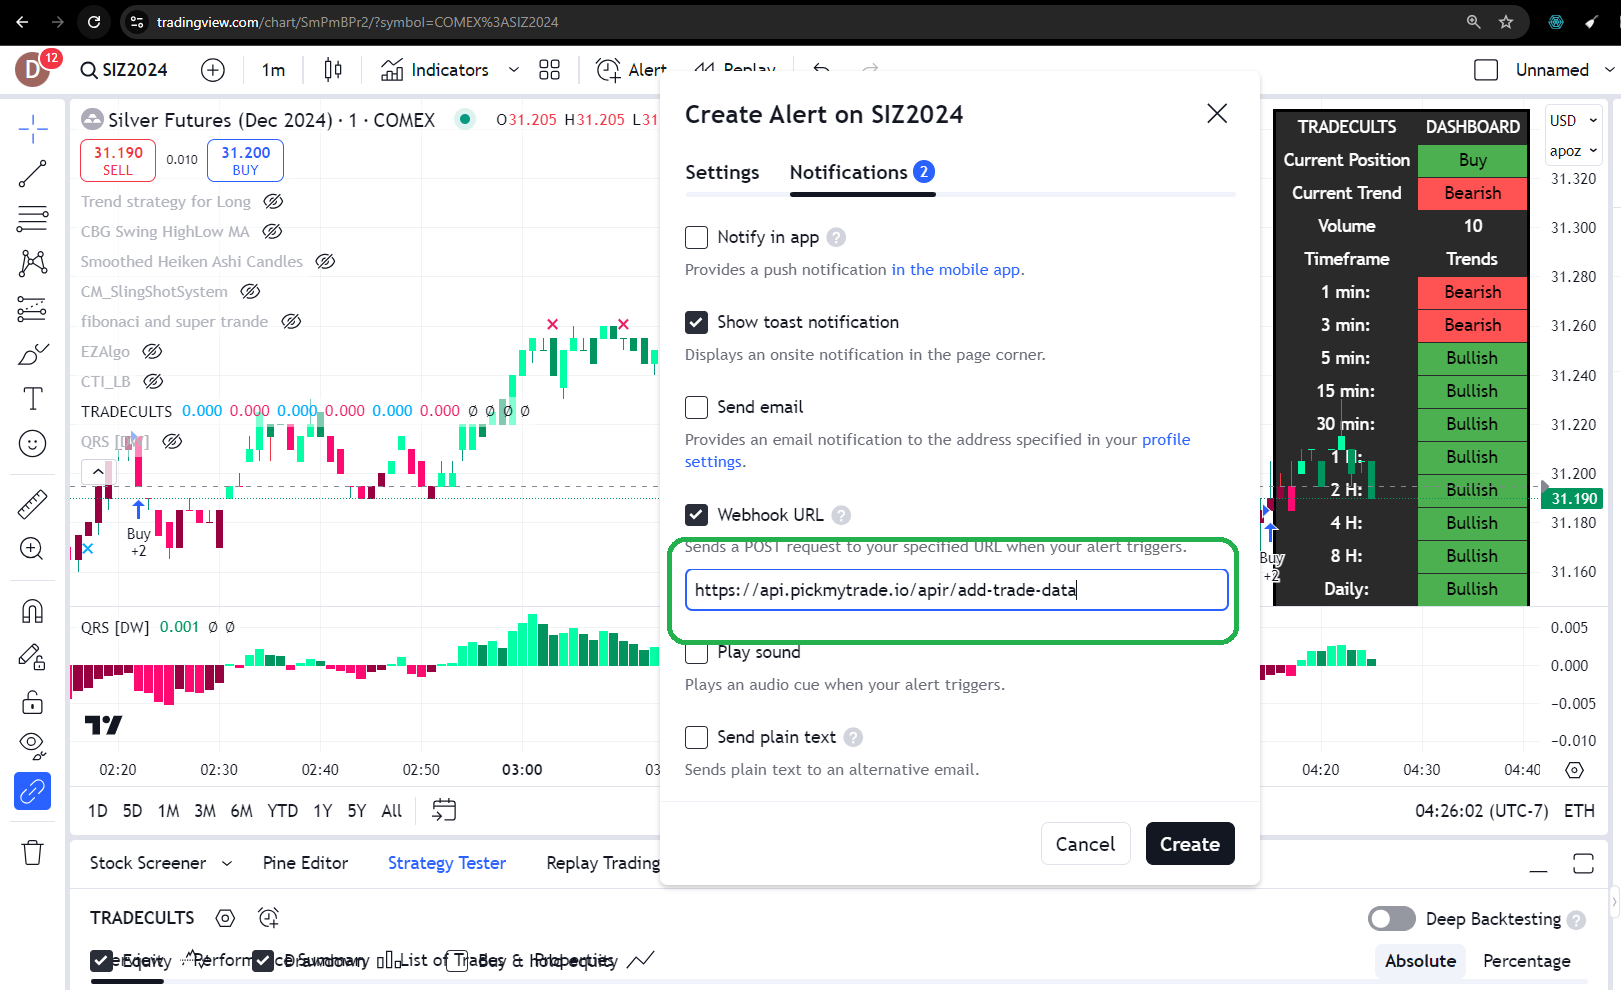
Step 14:
Enter the URL in the notification section of the alert in TradingView and click on Create. This will automate your alert from TradingView to Rithmic.
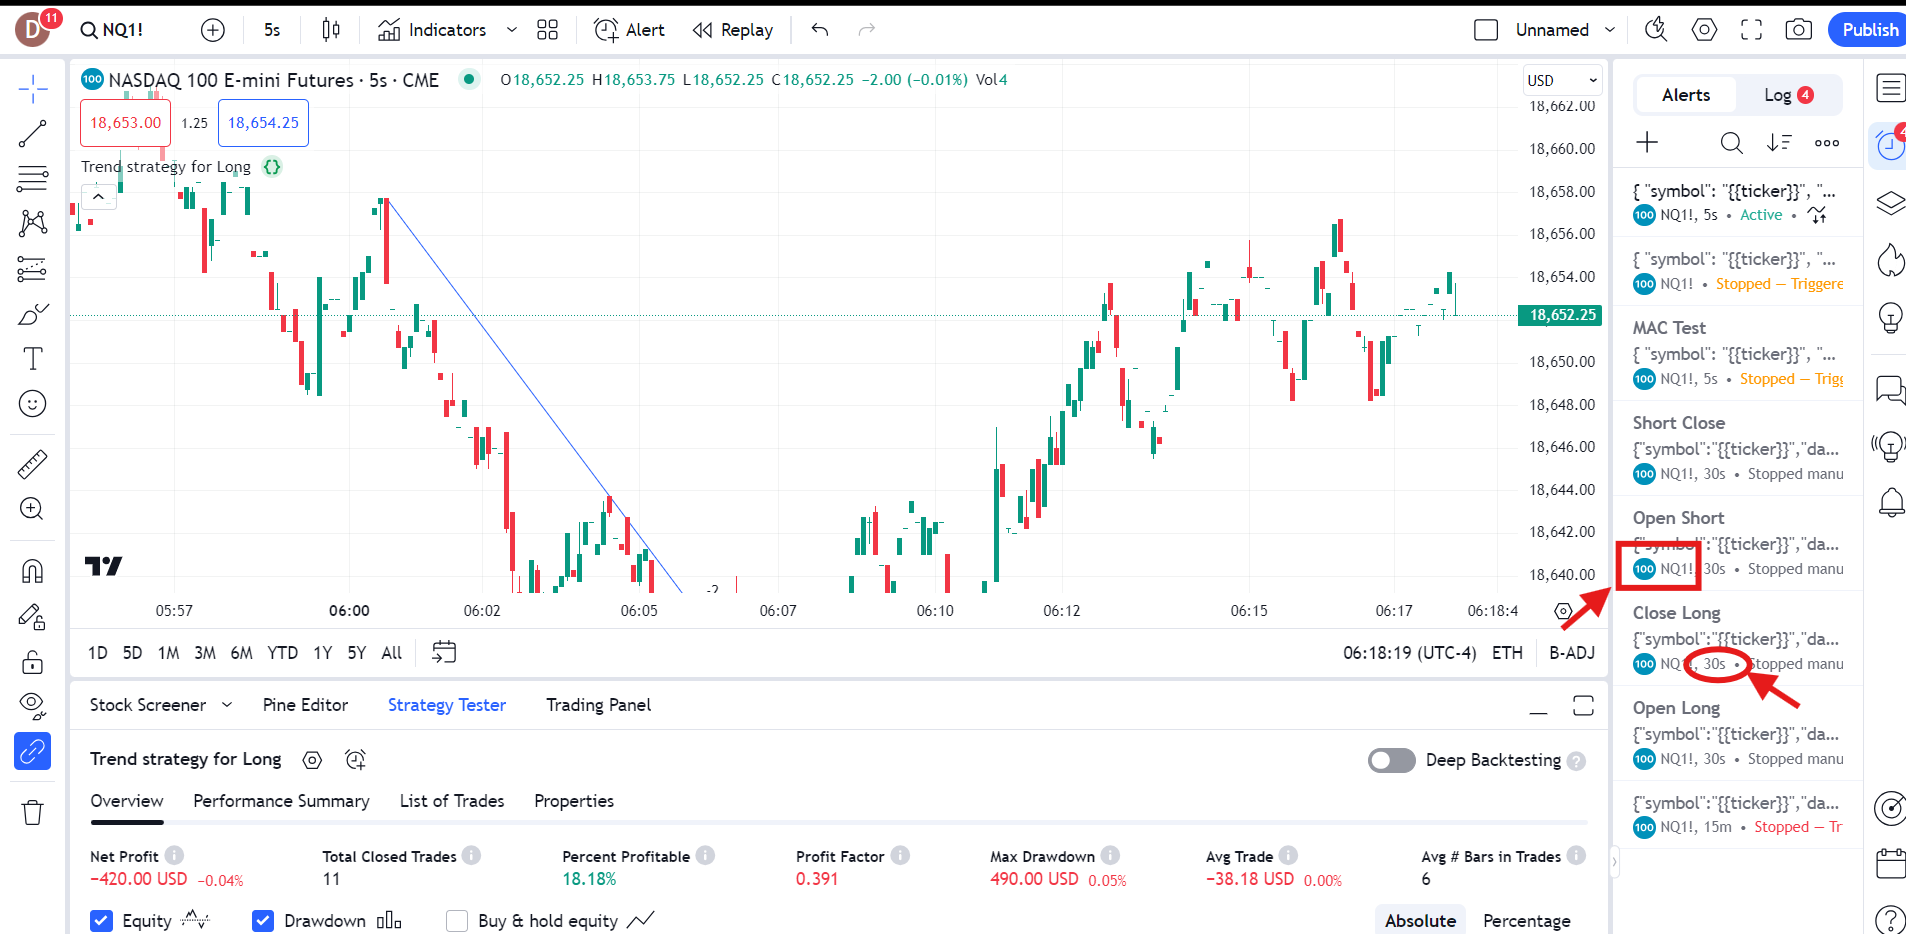
Step 15:
You can see in the alert section on which symbol the alert is configured and what time frame in TradingView, like this:
Step 16:
Once the alert is triggered, it will appear in the alert section of PickMyTrade.
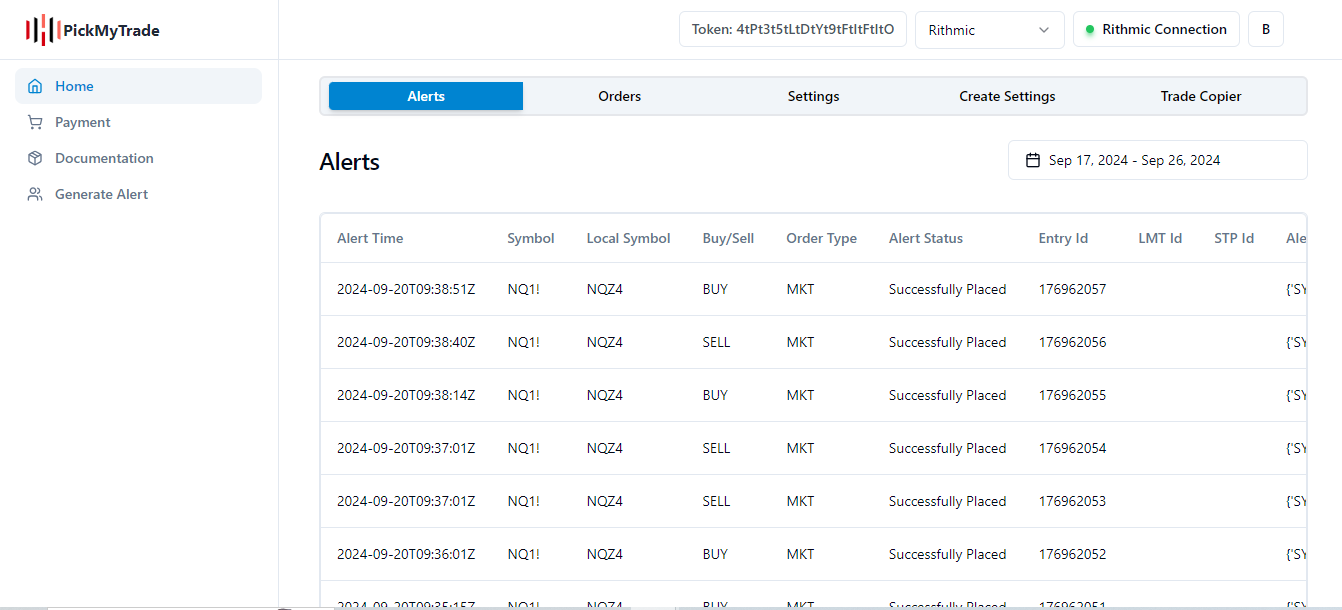
Step 17:
Once the alert is triggered, it will appear in the alert section of PickMyTrade.
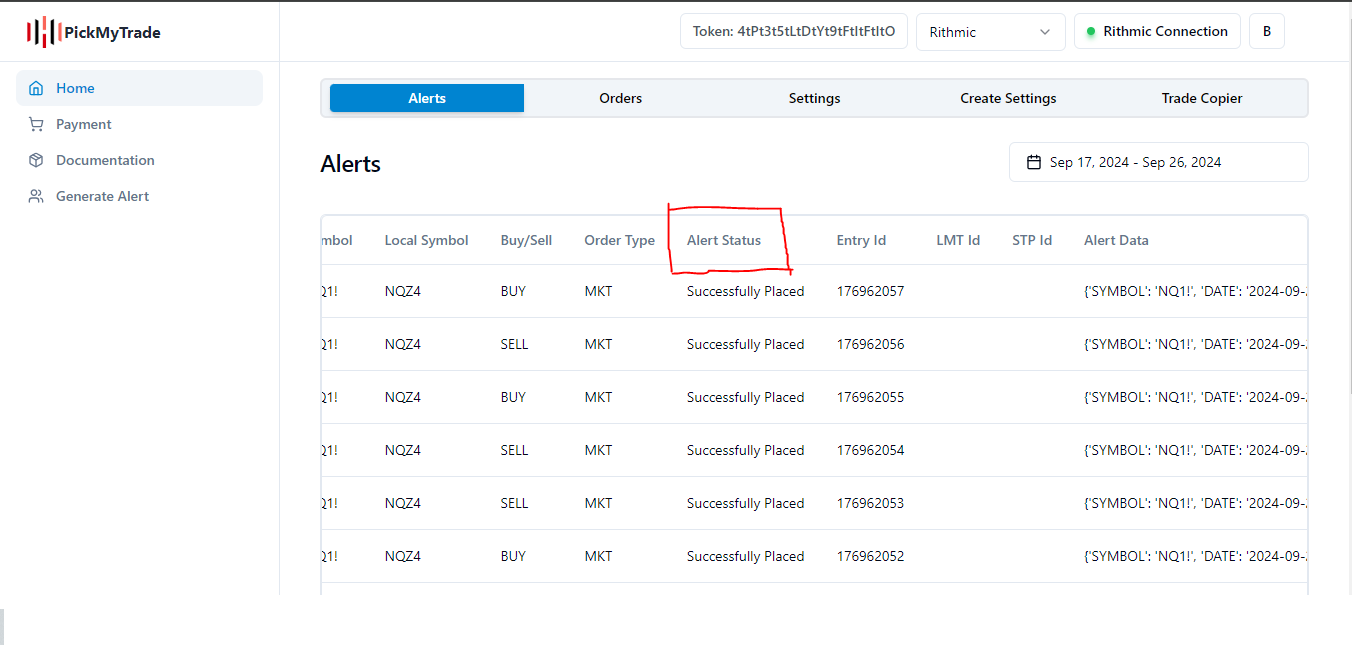
Step 18:
You can see if any errors occur, or if the alert is placed successfully. If successfully placed, you will be able to see the Entry trade ID, Take Profit, and Stop Loss ID on Rithmic.
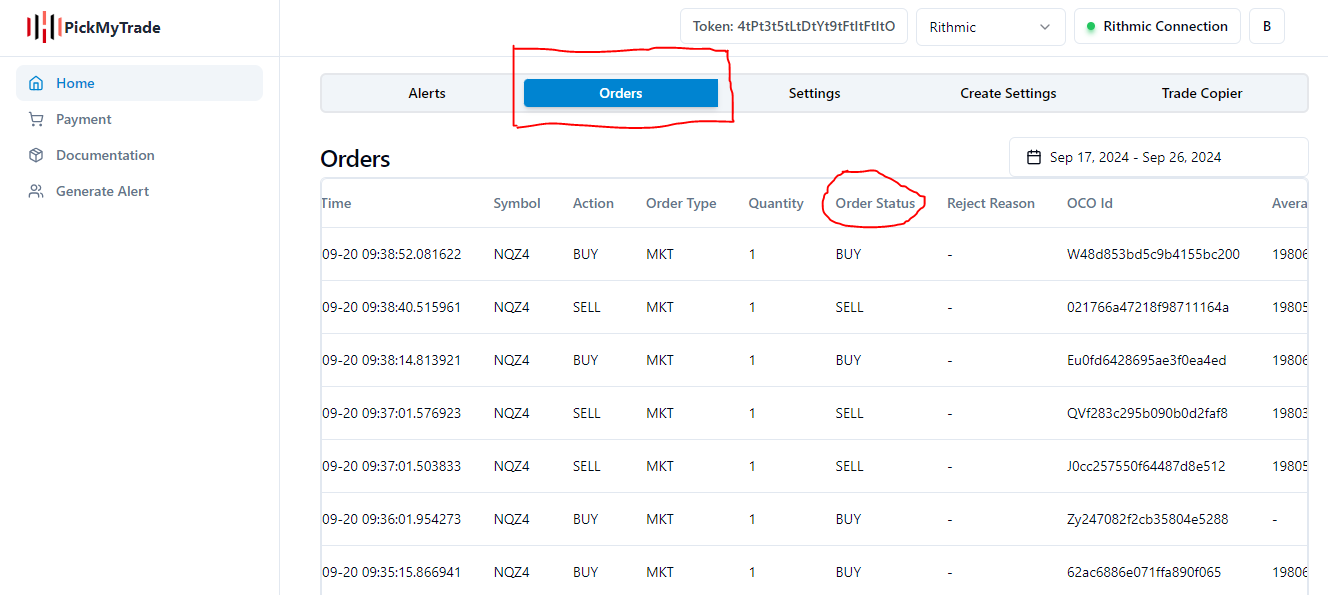
Step 19:
You can see the same order in the 'Order' section in the 'Orders' tab of PickMyTrade. It will show all trades placed on Rithmic using your algorithm.